Saturday, February 28, 2015

KAPALABHATI

- By Hemisha Marolia D'silva (Singapore)

In Sanskrit the word 'Kapal' means 'cranium' or 'forehead' and 'Bhati' means 'light' or 'splendour' and also 'perception' or 'knowledge'. Hence Kapal Bhati is the practice which brings the state of light or clarity to the frontal region or the brain.

There are four different ways of doing Kapalbhati. One should do all four only after mastering the first technique. Only after mastery of the first should one attempt the second and then third and hence forth.


TECHNIQUE 1- Preparatory Practice
  • Sit in a comfortable meditative asana, for eg. sukhasana or padmasana. The head and spine must be straight with the hands resting on the knees with the palms facing the sky.
  • Close the eyes and relax the entire body.
  • Exhale through both nostrils with a forceful contraction of the abdominal muscles. The following inhalation should take place passively by allowing the abdominal muscles to relax.
  • Inhalation should be spontaneous recoil, involving no effort.
  • After completing 20-30 rapid breaths in succession, inhale and exhale deeply. Allow the breath to return to normal.
  • This is one round. One can do up to 10-20 such rounds, as per ones comfort and time.
  • Breathing:
  • The rapid breathing should be from the abdomen; the shoulders and face should remain relaxed.
  • Beginners may take several free breaths between rounds.
  • The number or respiration (inhalation and exhalation) may be increased gradually from the initial 20 up to 50, as the abdominal muscles become stronger.
  • At an advance stage one can do up to 100 breaths per round.

Sequence:

As this process clears the nasal cavity, kapalbhati should be done before the other pranayamas like Anulom Vilom, Bhastrika, etc

Precautions:
  • Kapalbhati should be performed on an empty stomach, 3-4 hours after meals. If practised late at night, it can prevent sleep.
  • If pain or dizziness are experienced, stop the practice and sit quietly for some time. Practise with more awareness and less force. If problem continues, consult a competent teacher.

Contra- indications:

Kapalbhati should not be practiced by those suffering from heart problems, high blood pressure, vertigo, epilepsy, stroke, hernia, or gastric ulcers. It is not recommended during pregnancy.

Benefits:
  • Kapalbhati has a cleansing effect on the lungs and is a good practice for respiratory disorders.
  • It balances and strenghtens the nervous system and tones the digestive organs.
  • It purifies the nadis, and removes sensory distractions.
  • It energizes the mind for mental work and removes sleepiness.

TECHNIQUE 2 - Alternate Nostrils

Same as above only difference is that one has to raise the right hand to the nose.

Left Nostril: Close the right nostril with thumb. Exhale forcefully and inhale passively through the left nostril. 10 times. Like the earlier technique it should be done by the abdomen alone; the chest, shoulders and head remain relaxed.

After 10 breaths take a deep breath through the left nostril

Right Nostril: Close the left nostril with the ring finger of the right hand and repeat the process through the right nostril.

Both Nostrils: Replace the hand on the knee. Repeat the process through both Nostrils.

Duration:

10 breaths through the left, the right and both nostrils forms one round. One can practice up to 10 such rounds.

Breathing:
Beginners may take several free breaths between rounds. The number of respirations may be gradually increased from 10 up to 50, as the abdominal muscles become stronger.

Contra-indications: Same as technique 1.

TECHNIQUE 3 - Antar Kumbhaka ( inner retention)
  • Only after perfecting technique 2, antar kumbhaka may be commenced.
  • At the end of the round, inhale deeply and retain the breath for a comfortable length of time without straining.
  • Exhale slowly with control. Practice up to 5 rounds.


Sequence: Practice just before meditation techniques.

Precaution: Do not practice with bandhas without seeking the guidance of a competent teacher.

Contra-indications: Same as technique 1.

TECHNIQUE 4 - Bahir Kumbhaka ( external retention)

Only after perfecting technique 3, bahr kumbhaka may be commenced.
At the end of the round, inhale deeply and retain the breath for a comfortable length of time. Exhale slowly.Retain the exhaled breath for as long as you are comfortable.

Duration:
  • Up to 5 rounds.
  • Experienced practitioners can gradually increase the number or respirations to 60, and slowly increase the duration of external retention up to 30 seconds.
  • Further rounds should be practiced only under guidance of a competent teacher.
  • Do not strain.


Awareness:
  • Physical - on the rhythmic, forceful exhalation.
  • Spiritual- on the void at the eyebrow center.
  • Precautions:
  • Proceed slowly with awareness of the effects of the practice. Build up the number of breaths, number of rounds and length of retention gradually.
  • Do not strain by practicing longer periods. If breathlessness is experienced then discontinue the process or reduce the number of rounds.

Contra-indications: Same as technique 1.

Friday, February 10, 2012

Bhujangasana - Cobra Pose

Bhujangasana concentrates on your spine and abdomen. The traditional texts say that Bhujangasana increases body heat, destroys disease, and awakens kundalini.

All the asanas are believed to develop or strengthen a particular human quality or attribute or build a human value. Bhujangasana is believed to develop will power and determination in the people who practise it regularly.

HOW TO:

  • Lie on your stomach with legs pointing out, heels together & forehead to the ground.
  • Place palms on the floor at the side of your chest
  • Lift head and shoulder backward without pressure on the palms while inhaling 3 seconds
  • Do not lift higher than the naval region and hold your breath for 6 seconds
  • Breathe out 3 seconds and return to staring position.
BENEFITS
  • Opens the heart and lungs
  • Strengthens the spine & keeps it supple and flexible
  • helps building confidence
  • stimulates the liver, pancreas & facilitates digestion
  • Stretches chest and lungs, shoulders, and abdomen
  • Firms the buttocks
  • Helps relieve stress and fatigue
  • Therapeutic for asthma
  • Helps in curing snoring

CONTRAINDICATIONS

Abdominal injuries, hypertension, severe cardiac problem, hernia, colitis, Back injury, Carpal tunnel syndrome, Headache and Pregnancy

Also do not continue with the asana if you are not comfortable or experience any kind of discomfort while performing the asana. It is always better to continue with the asanas when you are with an experienced instructor / teacher.


Friday, February 25, 2011

Yoga At Work

We lead a sedentary lifestyle with no time for ourselves. This doesn’t affect us right away but in the long run results in backaches, frozen shoulder, neck pains, carpal tunnel syndrome (or RSI) and the list goes on. All these and more can be avoided with some simple exercises.

Working in front of a computer, sitting at a desk or driving are all sedentary activities. These lead to strain on your neck, shoulder, back and wrist which leads to tension and stiffness causing pain. Simple asanas modified to fit your work place will help ease the tension in your body, increase the muscles strength, improve flexibility and most importantly refreshes your tired mind.

The four important points you need to remember for your day to day life are:

  1. Right posture
  2. Breathe right
  3. Stretch
  4. Relax

Believe it or not these are the four simple things that will make you more flexible and pour new energy into you.

RIGHT POSTURE

We have learnt the importance of spine and right posture when we were in school. But down the line we have forgotten its importance. Spine is like the hose the more you bend it the less circulation of blood in your body. So stand or sit erect. It is never too late to correct your posture while standing and sitting.

  • While standing or sitting you should make sure that your body weight is evenly distributed between the legs or buttocks. Make sure you don’t lean to one particular side.
  • When you stand your legs should be parallel to one another
  • Don’t dangle you feel while sitting make sure they are flat on the ground
  • Sit or stand straight and tall but don’t over do it. If you feel a lot of stress in your back then its not the right posture.


BREATHE RIGHT

We all breathe but do we breathe right? Most of us breathe quickly & don’t really breathe in. What I mean is the right way of breathing is to take deep breaths and when you breathe in your stomach swells up, when you breathe out it goes in.

Try it! Many of us don’t do it this way. If you practice this you will get used to it and there will be more oxygen in your system. More oxygen means more energy.

STRETCH

Have every seen a cat or dog wake up from sleep? The first thing they do is stretch their entire body. We should ideally do this every morning.

The minute a particular muscle is unused for a long time they get rigid. By stretching your muscles remain supple and flexible.

  • Ankle rotations (clockwise and anti-clockwise)and flexing
  • Stretch your legs while sitting at your desk. Try to keep your leg straight from the knee and hold that position for at least 20 counts for each leg. This strengthens your knee and the muscles around it. You should not cross your legs under the desk as it cuts circulation of blood.

  • Sit on your chair or stand and bend down to touch your toes.

  • Shoulder shrugs helps ease the tension in your shoulder.


  • Clasp your hands and turn the palm up. Now stretch up and pull yourself up - Straight & side-ways. This will not only stretch your shoulder but also stretch your trunk muscles. You can do this sitting or standing.

  • Clasp your hands behind and bend forward. This gives a good stretch to your hands, back & shoulder.
  • Do namaste, keep your fore arms parallel to the floor and move your hands up and down. This exercises your wrist, arms and shoulders.

  • Wrist rotation with fingers closed fist, wrist flexing with open palms and fingers stretching. Do this especially if you are using the computer a lot. It will help avoid the Repetitive Strain Injury (RSI). You can even use a foam ball to exercise your fingers.

  • Neck stretches: side to side, drop to shoulder, up and down and complete circle.


Ø Eye exercises: blink a lot, move the eye balls from side to side, up and down, diagonal and in circle. If you cannot do it all together then do it one at a time & close your eyes for a few seconds before you start the next exercise.

Listed here are only some of the stretches that can be done at work. There are many more that can be done but cannot be added to this article.

RELAX

It is very important to relax even if it means for a short time. A break from your work will help you think better and perform better. I don’t mean going for a holiday right in the middle of work but something short and crisp.

  • Try cupping your eyes for a few seconds when you are using the computer this will relax your eyes and refresh your mind.

  • Every 45 mins to 1 hour get up from your seat walk for a minute or two.
  • Drink a lot of water. Keeps you hydrated
  • Sit on your seat with your eyes closed and to avoid thinking concentrate on all the sounds you can hear around you. You may catch some gossip if you hear closely!

In this fast food age many find it very difficult to take time out for fitness which is understandable. But these simple tips can go a long way in reducing your doctor and medical bill. Like fast food this is fast yoga which will keep you flexible, energetic and fast!

Saturday, September 25, 2010

Yog Mudra

If yoga is a tree then asana is one of the branches of this big tree. Yoga is the union of mind, body and soul. Each asana or pranayam affects the body, mind and soul equally.

Yog Mudra promotes flexibility for the body and humility of mind & soul.


METHOD
  • Sit erect in Padmasana, ardha padmasan or sukhasan.
  • Take your arms behind your back and interlock hands or hold the right wrist with your left hand.
  • Take a deep breathe and twist from your hip to your right side. Exhale slowly as your bend forward from your hip to touch your forehead to your knee. Relax your body as you rest your forehead on your knee.
  • Hold this position for 3 counts. Slowly inhale and revert to the first position.
  • Repeat the asana on the left side and for the third time repeat the asana by bending forward and trying to touch your forehead to the floor.
  • This completes one round of Yog Mudra. Repeat the set 3 times.
BENEFITS
  • Tones and builds strong abdominal organs and nerves.
  • Prevents constipation, seminal weakness, displaced abdominal organs.
  • Reduces excess fat on abdomen and improves health of lower abdomen.
  • Prevents enlargement of prostate glands & collapse of uterus.
  • Stretches the spinal column, neck and back muscles and makes them supple.
DO NOT DO IF:
  • You have stiff neck, trunk, knees or severe back ache.
  • You have Acute stomach ache/abdominal disorders hydrocele or hernia.
DISCLAIMER
  • If you experience pain while performing the asana then do not proceed. It is advisable that your consult your doctor before you start yoga or any form of exercises.
  • Wait for at least 2 hours after food to do any yoga asans

Saturday, September 18, 2010

TRATAK


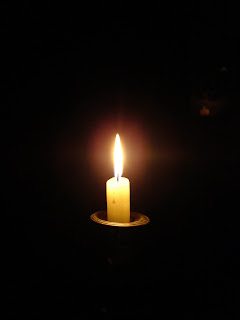
Tratak is a method of meditation which involves concentrating on a single point such as a small object, candle flame or your thumb nail for a certain period of time. Tratak is said to enhance the ability to concentrate. It may increase the power of memory and bring the mind in a state of awareness, attention and focus. Tratak meditation extends beyond a simple gaze; it is about attuning to your higher-self. It is an apt meditation technique for students, it not only sharpens memory and improves concentration, but also brings with it, relaxation and stress relief. Light meditation music in the background facilitates easing into the technique in a beautiful manner.


METHOD
  • Light a candle, three to four feet away and sit erect in front of it in vajrasan or sukhasan. The flame should be at eye level so that it can be seen comfortably.
  • Begin with slow and deep breathing. While breathing, keep a steady gaze at the flame. Keep your gaze fixed at the flame without blinking for as long as possible.
  • Imagine the flame is entering your body through your eyes and illuminating your inner self.
  • If your eyes start to water gently close your eyes & cup them with your palms.
  • Try to imagine the same flame with closed eyes as you were seeing it with open eyes. If you are able to practice tratak without blinking your eye, it will be easy for you to see the flame with closed eyes.

BEST TIME:
It is best done during the early hours of the morning, or in the night when it is natural dark. If done during daytime, practice it in a dark room.

BENEFITS
  • It corrects minor eye defects.
  • Increases concentration, memory, and mental power.
  • Reduces stress and tension.
  • Stimulates the nervous system.
  • Its said to control of ciliary’s reflex and
  • Stimulate the pineal gland.

DO NOT PRACTISE IF:
  • Eye ailments like – eye strain, myopia, early symptoms of cataract and astigmatism
  • If eye number is very high (more than 5)
  • If you have under gone an eye surgery recently consult your doctor before you start the practice
  • If while practicing you feel uncomfortable stop the practice & keep your eyes closed till you feel comfortable to open them. Consult a doctor and an experienced yoga teacher before you start the practice again.